


Shopify Web Pixel API makes it easier to collect customers' behavioural data. We will be creating a simple tracker that sends add-to-cart events and event data to our app backend. While making this tracker we will understand how this extension works.
Prerequisites
I am assuming that you have some knowledge of building Shopify apps.
All the code is available on my GitHub repository (Link).
I have already created a basic test app using the command
yarn create @shopify/app

To use Pixel API our app needs two Shopify scopes. Scopes are write_pixel and read_customer_events.
./shopify.app.toml
# This file stores configurations for your Shopify app.

scopes = "write_products,write_pixels,read_customer_events"
We need to install the app on our development store using the command.
yarn dev

With this app installation end's on the store now we need to start tracking events with pixel API.

To connect pixel API with our current app we will use a Shopify command to create an extension.
yarn run shopify app generate extension
There are many extension options available we need to choose Web Pixel.

After this, we can see that a new folder has appeared in our app folder structure.
Now we need to create an endpoint to enable pixel API. We will use the webPixelCreate mutation.
app.post("/api/webpixel", async (_req, res) => {
  const client = new shopify.api.clients.Graphql({
    session: res.locals.shopify.session,
  });

  const response = await client.query({
    data: {
      query: `
      mutation webPixelCreate($webPixelInput: WebPixelInput!) {
        webPixelCreate(webPixel: $webPixelInput) {
          webPixel {
            settings
            id
          }
          userErrors {
            code
            field
            message
          }
        }
      }
      `,
      variables: {
        webPixelInput: {
          settings: {
            accountID: crypto.randomUUID(),
          },
        },
      },
    },
  });

  if (response.body.data.webPixelCreate.userErrors.length) {
    const errors = queryResponse.body.data.webPixelCreate.userErrors;
    throw new Error(errors.map((error) => error.message).join(" , "));
  }

  return response.body.data.webPixelCreate.webPixel;
});
We are first creating a graphql client. After that we are sending a webPixelCreate mutation.
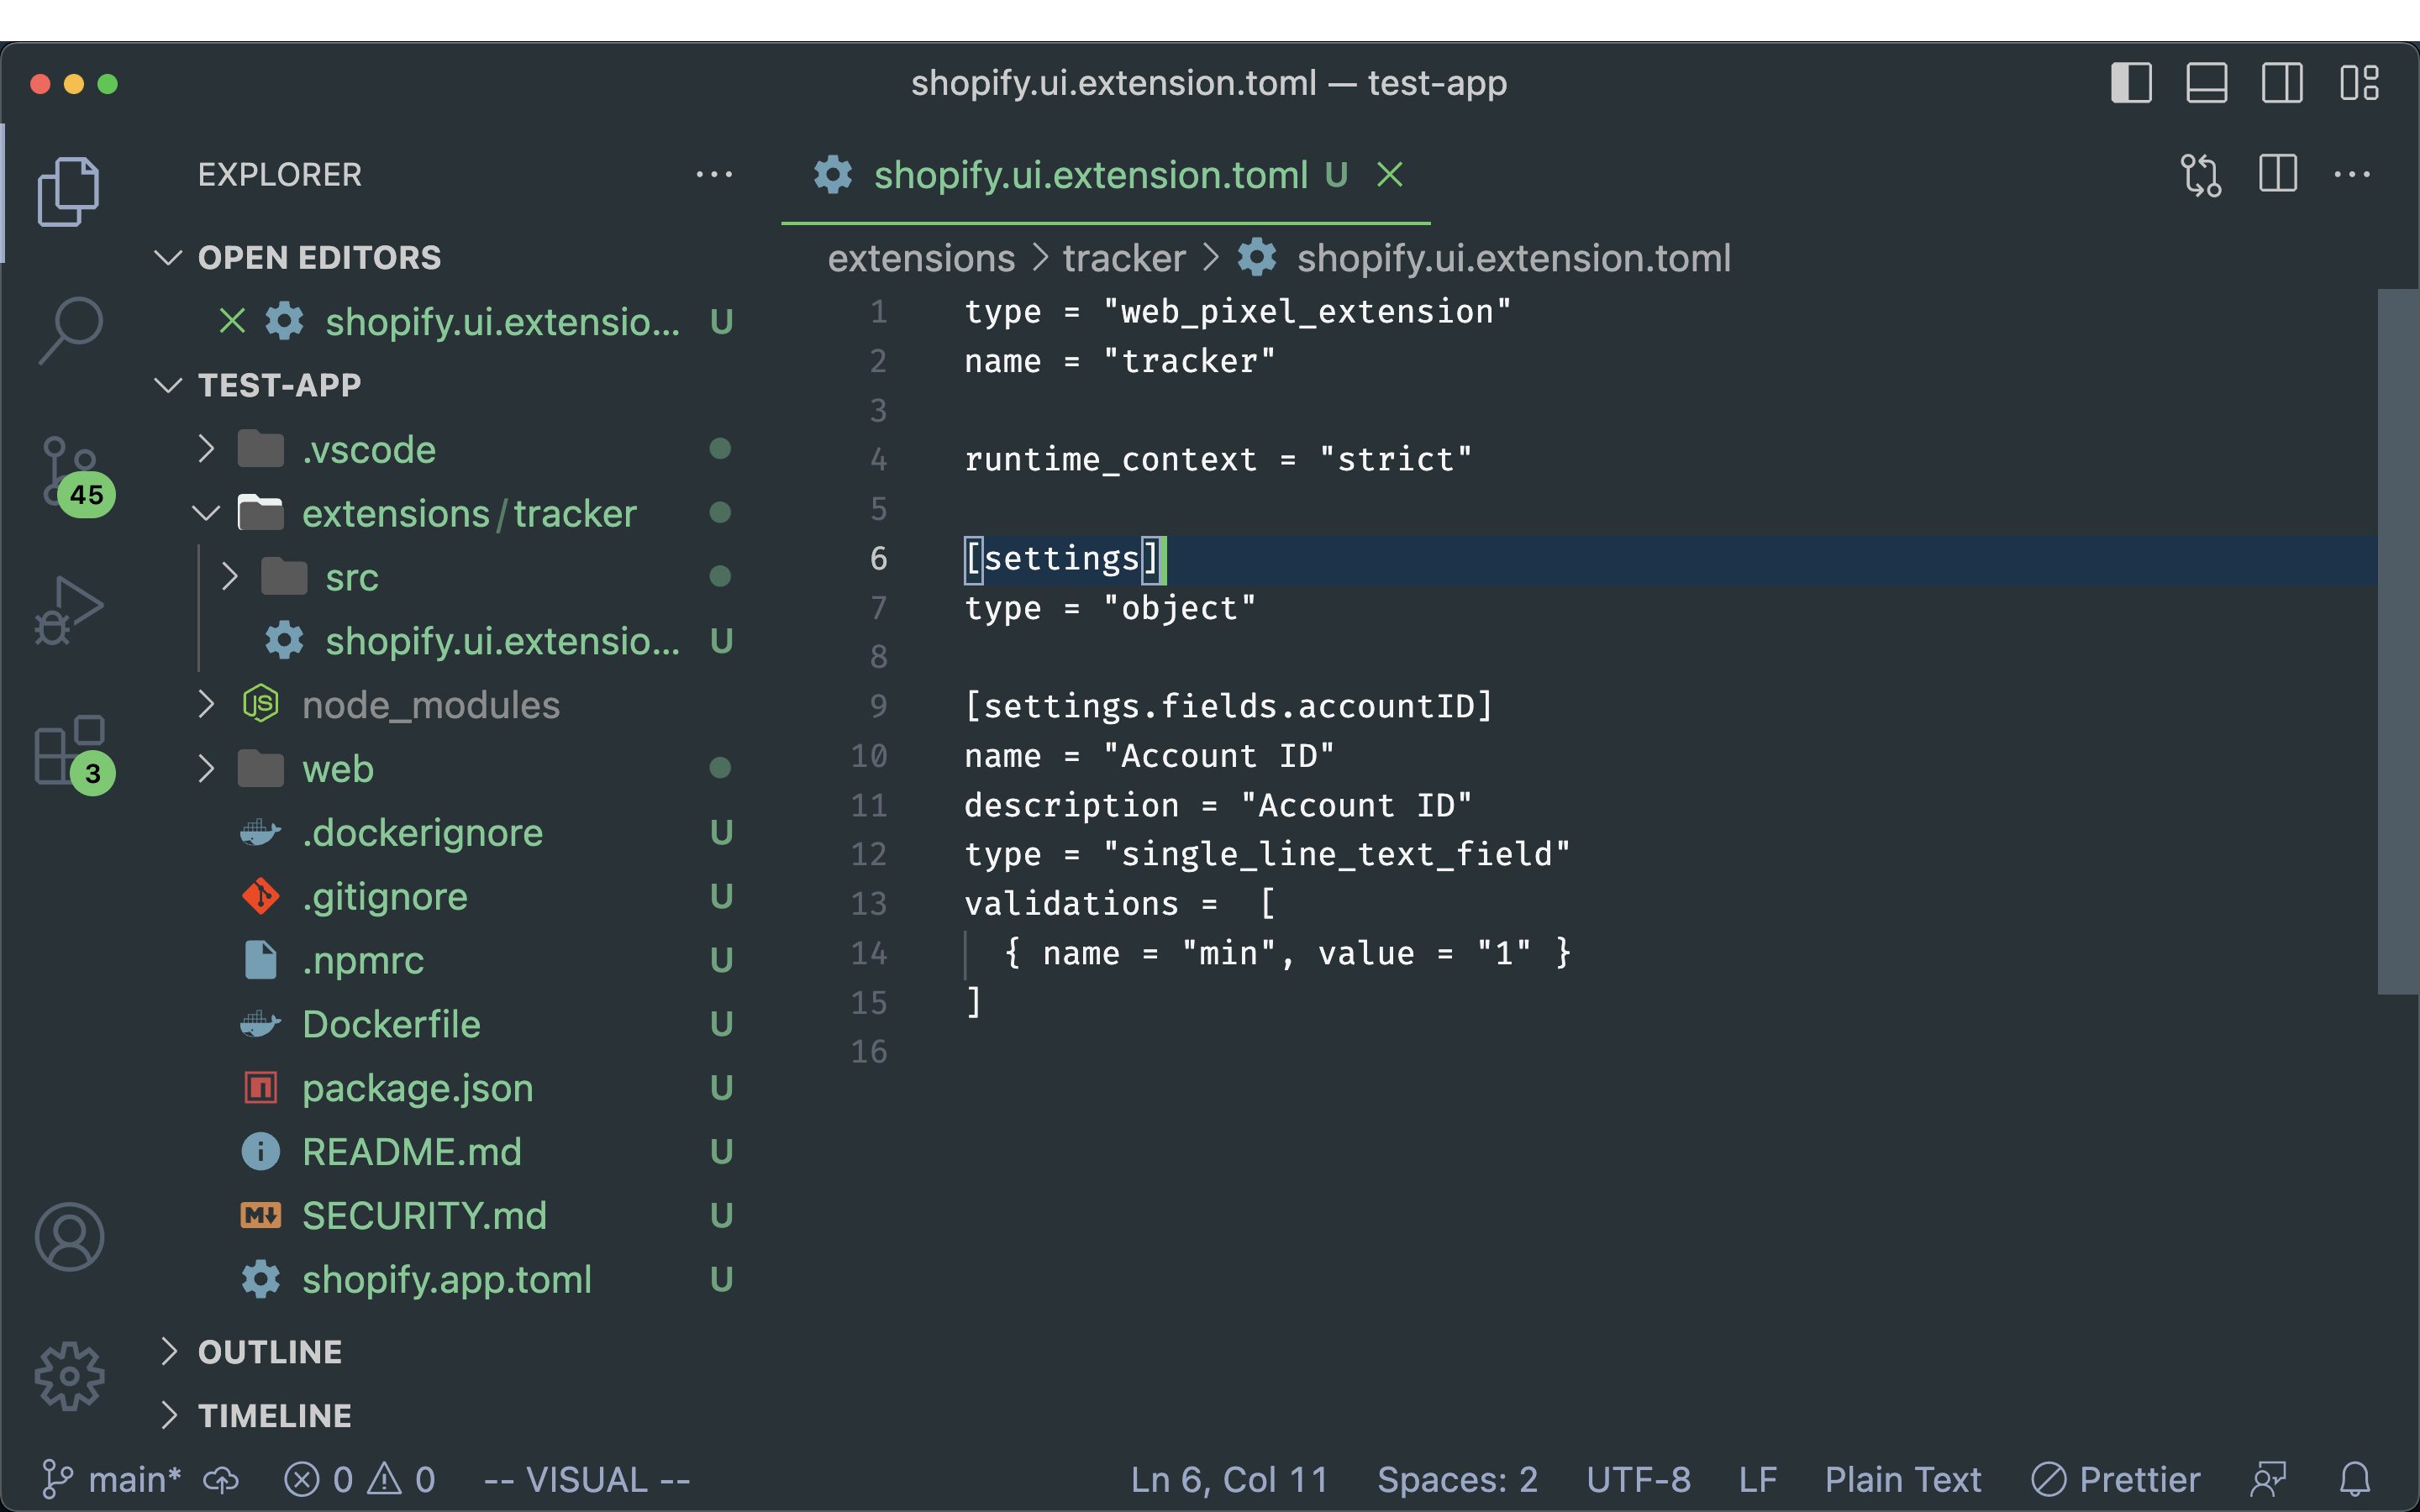
The accountID in variables is the setting that we pass from webpixel to Shopify. We can create other variables like this by editing the shopify.ui.extension.toml file.
Let's create a button on the frontend to consume this endpoint
./web/frontend/pages/index.jsx
import {
  Card,
  Page,
  Layout,
  TextContainer,
  Image,
  Stack,
  Link,
  Text,
  Button,
} from "@shopify/polaris";
import {
  TitleBar,
  useAuthenticatedFetch,
  useToast,
} from "@shopify/app-bridge-react";
import { useTranslation, Trans } from "react-i18next";

import { trophyImage } from "../assets";

import { ProductsCard } from "../components";

export default function HomePage() {
  const { t } = useTranslation();
  const fetch = useAuthenticatedFetch();
  const toast = useToast();

  const enableTracker = async () => {
    const response = await fetch("/api/webpixel", {
      method: "POST",
    });
    const data = await response.json();

    toast.show("Tracker installed");
  };

  return (
    <Page narrowWidth>
      <Button primary onClick={enableTracker}>
        Enable Tracker
      </Button>
      <TitleBar title={t("HomePage.title")} primaryAction={null} />
      <Layout>
        <Layout.Section>
          <Card sectioned>
            <Stack
              wrap={false}
              spacing="extraTight"
              distribution="trailing"
              alignment="center"
            >
              <Stack.Item fill>
                <TextContainer spacing="loose">
                  <Text as="h2" variant="headingMd">
                    {t("HomePage.heading")}
                  </Text>
                  <p>
                    <Trans
                      i18nKey="HomePage.yourAppIsReadyToExplore"
                      components={{
                        PolarisLink: (
                          <Link url="https://polaris.shopify.com/" external />
                        ),
                        AdminApiLink: (
                          <Link
                            url="https://shopify.dev/api/admin-graphql"
                            external
                          />
                        ),
                        AppBridgeLink: (
                          <Link
                            url="https://shopify.dev/apps/tools/app-bridge"
                            external
                          />
                        ),
                      }}
                    />
                  </p>
                  <p>{t("HomePage.startPopulatingYourApp")}</p>
                  <p>
                    <Trans
                      i18nKey="HomePage.learnMore"
                      components={{
                        ShopifyTutorialLink: (
                          <Link
                            url="https://shopify.dev/apps/getting-started/add-functionality"
                            external
                          />
                        ),
                      }}
                    />
                  </p>
                </TextContainer>
              </Stack.Item>
              <Stack.Item>
                <div style={{ padding: "0 20px" }}>
                  <Image
                    source={trophyImage}
                    alt={t("HomePage.trophyAltText")}
                    width={120}
                  />
                </div>
              </Stack.Item>
            </Stack>
          </Card>
        </Layout.Section>
        <Layout.Section>
          <ProductsCard />
        </Layout.Section>
      </Layout>
    </Page>
  );
}
This is a simple react component that we will use to enable the tracker.

Now let's send some customer events to our backend.
Pixel API can subscribe to different events the most common ones are
checkout_started - Fires on checkout start.
collection_viewed - Fires on collection page view.
page_viewed - Fires when customers view any page.
product_added_to_cart - Fires when the customer adds any product to the cart.
product_viewed - Fires when the customer visits the product page.
checkout_completed - Fires on checkout complete.
With Every event, we get an event object which consists of different types of data depending on the event. For example, when product_added_to_cart event fires then we will get an event object. This object will contain information about the product that the customer has added.
./extensions/tracker/src/index.ts
import { register } from "@shopify/web-pixels-extension";

register(({ analytics }) => {
  analytics.subscribe("product_added_to_cart", async (event) => {
    console.log("event", event);
  });
});
Now when we add a product to our cart we will get an event of this type.
{
    "id": "sh-b52dc9da-35AC-47D6-3C29-8ABBBD3D7BBB",
    "clientId": "76dfa2b795f37436170c42978f9dbaab",
    "timestamp": "2023-06-13T14:34:12.629Z",
    "name": "product_added_to_cart",
    "context": {
        "document": {
            "location": {
               // window location related
            },
        },
        "navigator": {
            // window navigator properties
        },
        "window": {
          // some important window properties
        }
    },
    "data": {
        "cartLine": {
            "cost": {
                "totalAmount": {
                    "amount": 600,
                    "currencyCode": "INR"
                }
            },
            "merchandise": {
                "id": "123456789",
                "image": {
                    "src": "https://something-random.com"
                },
                "price": {
                    "amount": 600,
                    "currencyCode": "INR"
                },
                "product": {
                    "id": "8123348812079",
                    "title": "The Collection Snowboard: Hydrogen",
                    "vendor": "Hydrogen Vendor",
                    "type": "",
                    "untranslatedTitle": "The Collection Snowboard: Hydrogen"
                },
                "sku": "",
                "title": null,
                "untranslatedTitle": null
            },
            "quantity": 1
        }
    }
}
To send this event to the backend we will use window beacon API.
The endpoint that pixel api request to send tracking data should be open. Pixel api request doesn't have the session token generated by the shopify app bridge. This session token validates the request.
import { register } from "@shopify/web-pixels-extension";
import {API_URL} from "./constants";

register(({ analytics, browser }) => {
  analytics.subscribe("product_added_to_cart", async (event) => {
    const url = `${API_URL}/track`;
    const isSuccessful = await browser.sendBeacon(
      url,
      JSON.stringify({ ...event })
    );
    if (!isSuccessful) throw new Error("Unable to send via Beacon API");
  });
});
We can now create a backend route for this endpoint.
app.post("/api/track", (_req, res) => {
  console.log(_req.body);
});
With this our simple tracker is finished!.